The last two weeks have been busy for me. How about you? Besides piecing some pineapple blocks, I also put together a program for the guild to help the group start working in miniature since the guild’s quilt show (scheduled for March 8, 2014) will feature a live auction of miniature and small quilts.
I provided tips for working with miniature quilts and two techniques for making accurate half-square triangles (HST). The first uses triangle papers or Thangles and the second uses bias strips. Following is a photo tutorial of this second method for 1.0 inch finished HSTs. Adjust beginning square size and bias strip cut to accommodate your triangle needs.
Note: there are several tutorials for this bias strip method out there, but I first saw this technique on The Quilt Show (http://www.thequiltshow.com) in their show (#1203) featuring Martha McCloskey.
For this tutorial, I cut 8 inch squares of fabric (light and dark), layered them right sides together.
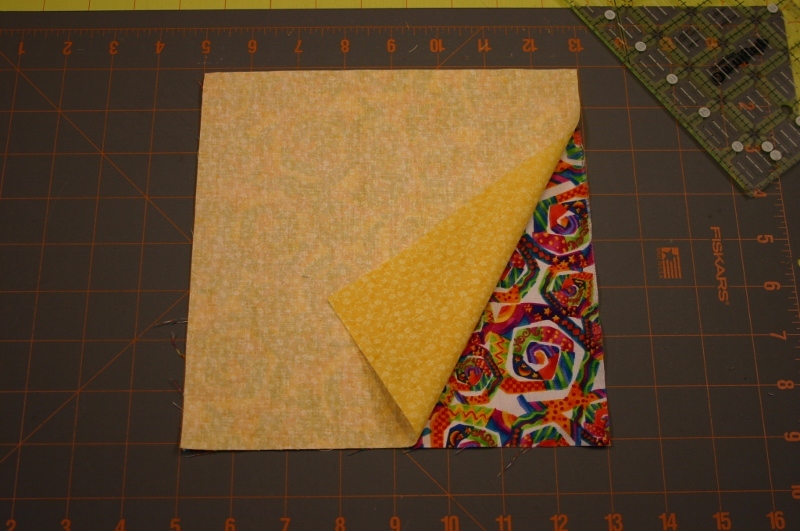
1) Cut diagonally, corner to corner and stack resulting triangles together.
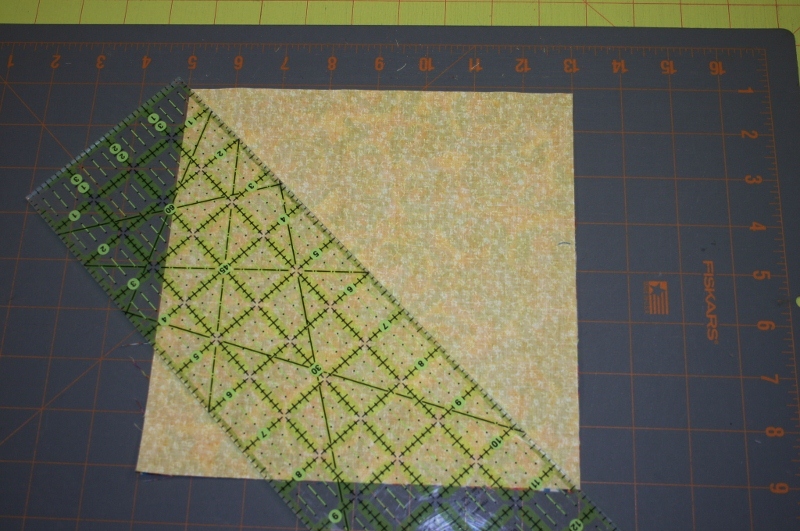

2) Use a ruler to accurately cut bias strips 2.0 inches wide. Don’t discard the last triangle cuts. They will be used, too.

3) Sew an accurate 1/4″ seam on the long sides of all strip sets.
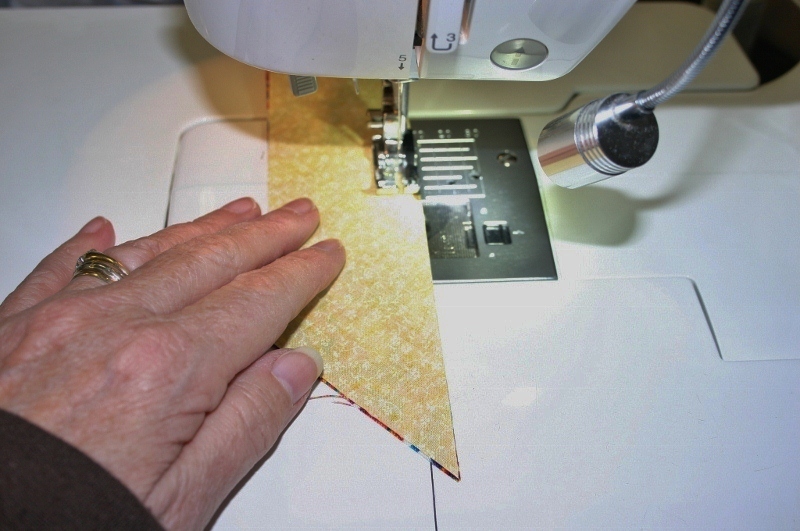
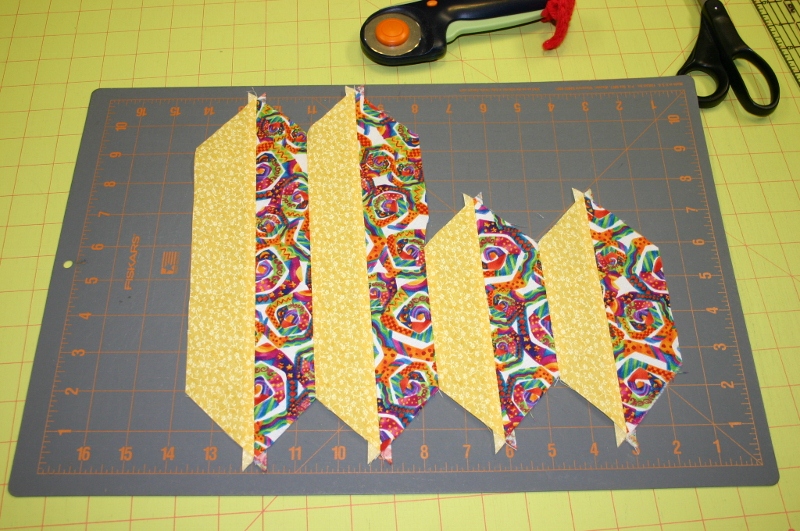
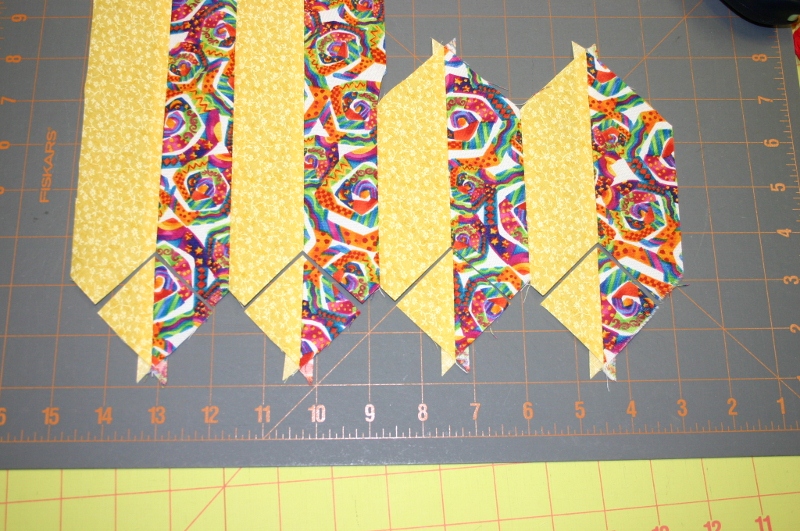
4) Sew these strip sets together so you have alternate fabrics, light/dark, light/dark, etc. You should have two long and two short strip sets sewn together. Press all seams open.

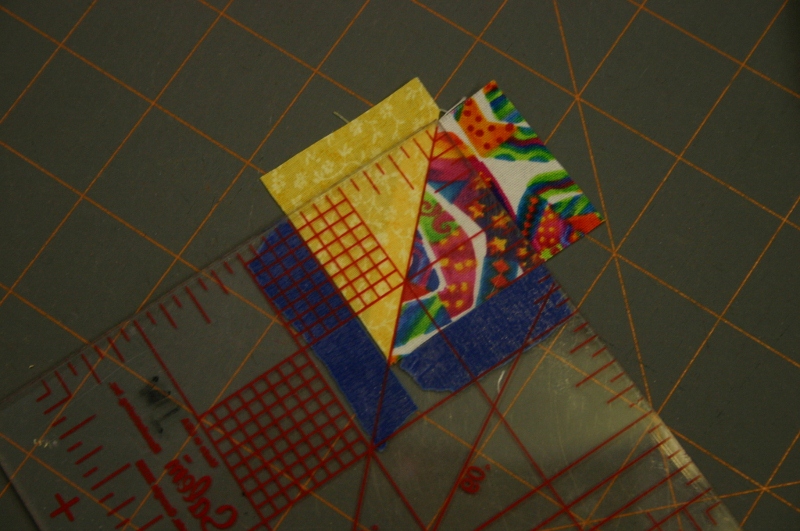
5) Using a small square-up ruler with a 45 degree line, set this line on the first seam with enough fabric showing to get the desired size HST. (The painter tape is on the ruler to help identify the measurement needed.)
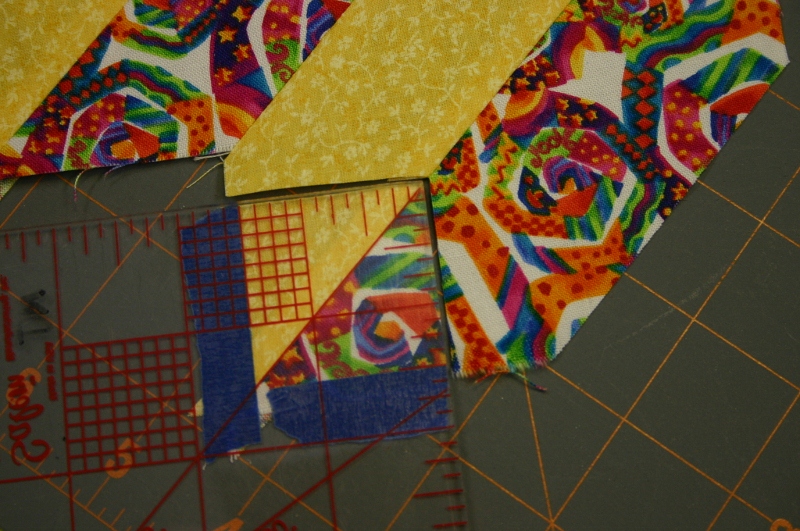
6) Cut just into the seam line at the ruler’s corner, then down the other side. Take care not to over-cut or you might cut into the next available triangle fabric.
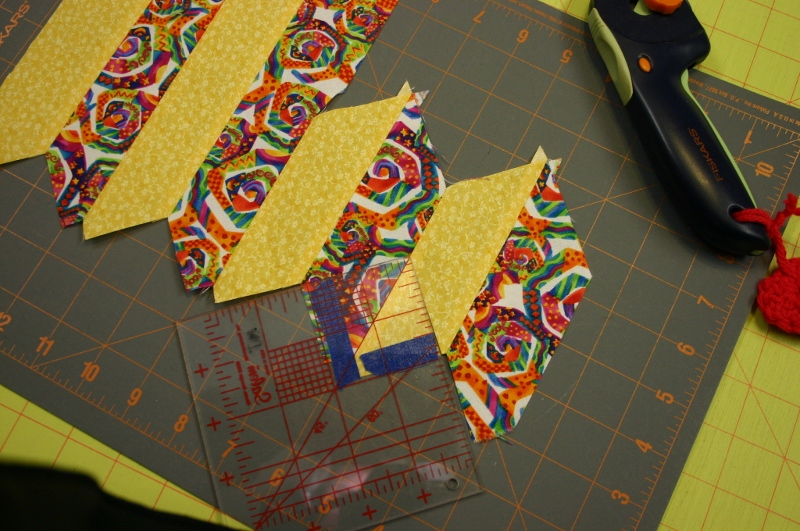
7) Move to the next seamed point and repeat steps 5 and 6. At any point, you can do the final trim on the opposite edges of the HSTs (see step 10). I like to get them all cut, then trim the entire pile of HSTs, but that’s me.
8) After you have made the first cuts from the pointed edges, move to the seams that you didn’t use and cut more triangles just the same way.

9) Continue cutting HSTs until you have used all fabric, including those two triangle sections from step 2.
10) If you haven’t already, turn each HST square and trim the opposite sides to exact measurements.
11) Piece as desired.
I hope you will try this method for creating perfect HSTs. Contact me (donna.nicholson49@gmail.com) if you have any questions.
Until next time, take 15 minutes and do something quilt-y.

May 28, 2013 @ 06:19:46
What a great way to make HSTs! Thank you for putting this tutorial out. Dasha
Feb 11, 2013 @ 15:41:11
I believe I got 24 or 25 HSTs (1 inch finished) from the starting squares.
Feb 11, 2013 @ 15:21:02
From the two 8″ squares, cut into 2″ bias strips, how many 1″ finished HST were made?